Build recurring flows
You can create a flow that performs one or more tasks (for example, sending a report by email) on a specific schedule:
Once a day, an hour, or a minute
On a date that you specify
After a number of days, hours, or minutes that you specify
Create the flow
Launch Power Automate and sign in using your organizational account.
In the left pane, select My flows.
Select New, and then select Scheduled--from blank.
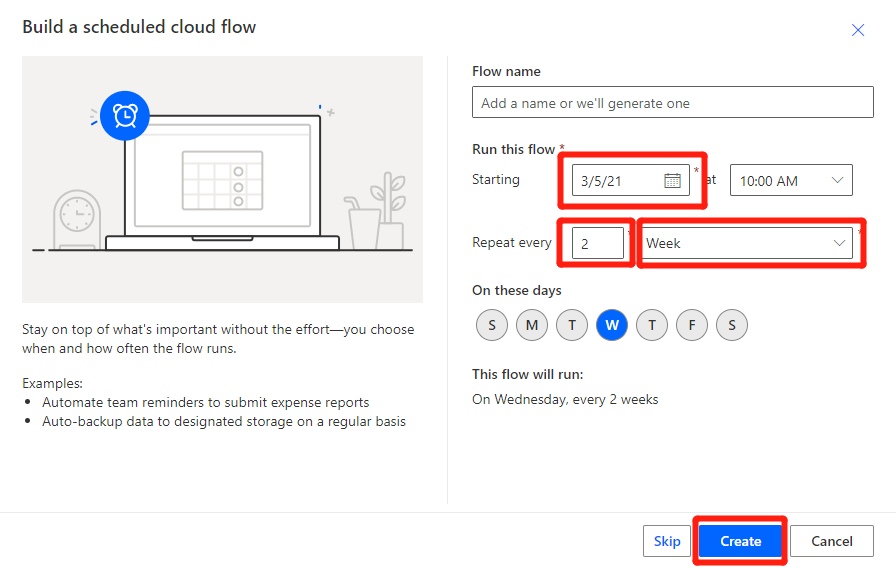
In the dialog box, specify the flow's name and how often the flow should run.
For example, if you want the flow to run every two weeks, enter 2 in the Interval field, and select Week in the Frequency field. You can also specify the day of the week your flow should run. The text at the bottom of the dialog box explains your inputs in plain language.

Once you are satisfied with your inputs, select Create.
Specify advanced options
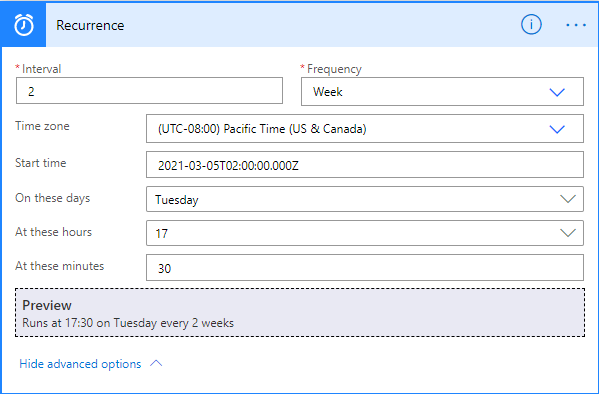
Once your flow is created, select the title of the Recurrence card to expand it. Select Edit and then Show advanced options.
Note
The advanced options vary, depending on the value of the Interval and Frequency fields. If the dialog box that you see does not match the graphic that follows, make sure that the Interval and Frequency fields are set to the same values that are shown in the graphic.
Here you can specify a time zone to reflect the local time zone, Universal Coordinated Time (UTC), or another time zone.
Specify the day or days of the week when the flow should run, and the time or times of day when the flow should run.
For example, set up the flow as shown in the following graphic to start it no earlier than noon (Pacific time) on Monday, January 1, 2018, and to run it every two weeks, at 5:30 PM (Pacific time) on Tuesday.

Use the compose action
Use the Data Operation - Compose (compose) action to save yourself from entering identical data multiple times when you are designing a flow. For example, if you need to enter an array of digits: [0,1,2,3,4,5,6,7,8,9] several times while you design your flow, you could use the compose action to save the array like this:
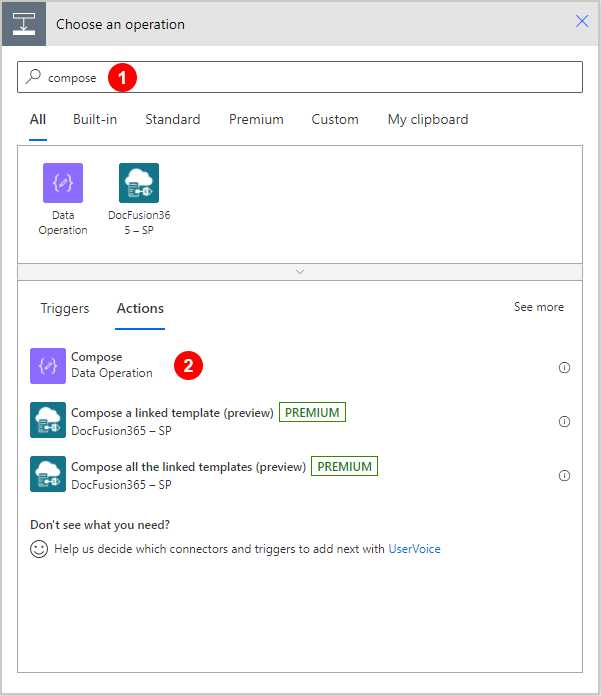
Search for Compose, and then select the Data Operation - Compose (compose) action.

Enter the array into the Inputs box you want to reference later:

Tip
For easier reference later, rename the Compose card by clicking on the text "Compose" on the title bar of the Compose card.
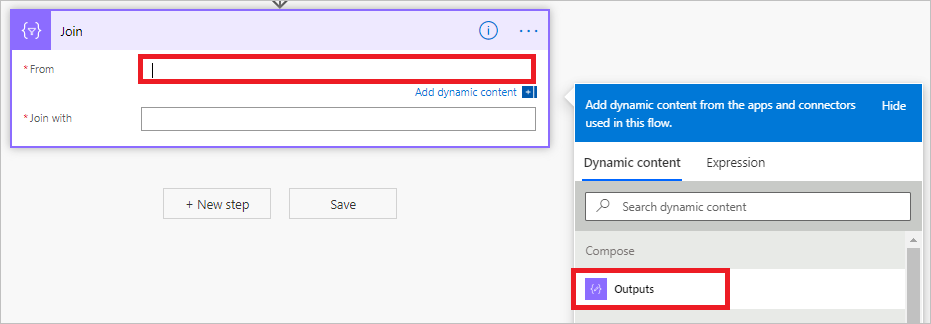
When you need to access the contents of the compose action, do so via the Output token on the Add dynamic content from the apps and connectors used in this flow list by following these steps:
Add an action such as Data Operation – Join.
Select the control to which you would like to add the contents you saved in the compose action.
The Add dynamic content from the apps and connectors used in this flow opens.
On the Add dynamic content from the apps and connectors used in this flow, select the Outputs token that’s under the Compose category of the Dynamic content tab.

Next Save the Flow in the top right corner

Then select the back arrow in the top left corner next to the name of the Flow

Finally, you can Run the Flow from the command bar at the top


No comments:
Post a Comment