Tuesday 26 November 2019

COC on a TABLE D365 CHAIN OF COMMANDS TABLE

CHAIN OF COMMAND ON A TABLE METHOD
In cases where you want to make changes to the standard code execution and it cannot be achieved via the extension or eventhandlers in that case we use a COC.

[ExtensionOf(tablestr(TableToExtend))] - > very important syntax.

[ExtensionOf(tablestr(TableToExtend))]
final class TableToExtend_Extension
{
    public void delete()
    {
        next delete();
        //...
    }

     public boolean canSubmitToWorkflow(str _workflowType)
    {
        boolean ret;
        //...
        ret = next canSubmitToWorkflow(_workflowType);
        //...
        return ret;
    }
       
    public str caption()
    {
        str ret;
        //...
        ret = next caption();
        //...
        return ret;
    }
}

NEXT keyword is very important and the code is executed based on the code being placed before or after the next keyword.

COC FORM BUTTON IN D365 CHAIN OF COMMAND

CHAIN OF COMMAND ON A FORM BUTTON
Yes with the new version it is possible to have a COC on a form BUTTON IN D365 .
It has the similar syntax as we use to follow as shown below.

[ExtensionOf(formControlStr(FormToExtend, Button1))]
final class FormButton1_Extension
{
    public void clicked()
    {
        next clicked();
        //...write your code here if you want to execute your logic after the std clicked event or else write .//it before the next clicked() line.
    }
}

DataSource1 - > is the datasource which needs to be customized .
Below line of code is very important
[ExtensionOf(formControlStr(FormToExtend, Button1))]


COC on a FORM DATASOURCE FIELD IN D365

CHAIN OF COMMAND ON A FORM DATASOURCE FIELDS
Yes with the new version it is possible to have a COC on a form datasource FIELDS .
It has the similar syntax as we use to follow as shown below.

[ExtensionOf(formdatafieldstr(FormToExtend, DataSource1, Field1))]
final class FormDataField1_Extension
{
    public boolean validate()
    {
        boolean ret
        //...
        ret = next validate();
        //...
        return ret;
    }
}

DataSource1 - > is the datasource which needs to be customized .

COC on a FORM DATASOURCE D365 CHAIN OF COMMANDS FORMDATASOURCE

CHAIN OF COMMAND ON A FORM DATASOURCE
Yes with the new version it is possible to have a COC on a form datasource .
It has the similar syntax as we use to follow as shown below.

[ExtensionOf(formdatasourcestr(FormToExtend, DataSource1))]
final class FormDataSource1_Extension
{
    public void init()
    {
        next init();
        //...
        //use element.FormToExtendVariable to access form's variables and datasources
        //element.FormToExtendMethod() to call form methods
    }

    public boolean validateWrite()
    {
        boolean ret;
        //...
        ret = next validateWrite();
        //...
        return ret;
    }
}

DataSource1 - > is the datasource which needs to be customized .

d365 eventhandler insert method table DataEventType::Inserting D365 Code

Below is the event handler code to write at the table level for inserting any value.

  [DataEventHandler(tablestr(FMRentalCharge),DataEventType::Inserting),
   SuppressBPWarningAttribute('BPParameterNotUsed', 'This is not production code')]
   public static void FMRentalChargeInsertingEvent(Common c, DataEventArgs e)
    {
        FMRentalCharge rentalCharge = c;
        FEDiscountEngine discountEngine;

        discountEngine = FMTotalsEngineBase::GetInstance() as FEDiscountEngine;
        if (discountEngine)
        {
            discountEngine.calculateChargeRate(rentalCharge);
        }
    }

FMRentalChargeInsertingEvent -> you can write any name .
SuppressBPWarningAttribute - > is optional( it is for not using the e parameter of the dataeventargs.)

update method d365 eventhandlertable DataEventType::Updating D365 Code

Below is the event handler code to write at the table level for Updating any value.

Eventhandler code for updating a value at the table level .

[DataEventHandler(tablestr(FMRentalCharge),DataEventType::Updating),
     SuppressBPWarningAttribute('BPParameterNotUsed', 'This is not production code')]
    public static void FMRentalChargeUpdatingEvent(Common c, DataEventArgs e)
    {
        FMRentalCharge rentalCharge = c;
        FEDiscountEngine discountEngine;

        if (rentalCharge.orig().PerUnitAmount != rentalCharge.PerUnitAmount ||
            rentalCharge.orig().Quantity != rentalCharge.Quantity)
        {
            discountEngine = FMTotalsEngineBase::GetInstance() as FEDiscountEngine;
            if (discountEngine)
            {
                discountEngine.calculateChargeRate(rentalCharge);
            }
        }
    }

FMRentalChargeUpdatingEvent-> you can write any name .
SuppressBPWarningAttribute - > is optional ( it is for not using the e parameter of the dataeventargs.

ValidatedWrite EventHandler D365 at table level

How to write a validate write data event handler code for a table

Right-click onValidatedWrite of the event at the table level, and then select Copy event handler method.
Below is for the table FMVehicle

Class FMVehicleEventHandlers //write any name of the class
{
    /// <summary>
    ///
    /// </summary>
    /// <param name="sender"></param>
    /// <param name="e"></param>
[DataEventHandler(tableStr(FMVehicle), DataEventType::ValidatedWrite)]
    public static void FMVehicle_onValidatedWrite(Common sender, DataEventArgs e)
    {
        ValidateEventArgs validateArgs = e as ValidateEventArgs;
        FMVehicle vehicle = sender as FMVehicle;
        boolean result = validateArgs.parmValidateResult();

        if (vehicle.NumberOfCylinders > 8)
        {
            result = checkFailed("Invalid number of cylinders.");
            validateArgs.parmValidateResult(result);
        }
    }
}

Below is the code to write at the form level if the requirement is to just  validate at the form level.

 [FormDataSourceEventHandler(formDataSourceStr(FMRental, FMRental), FormDataSourceEventType::ValidatingWrite)]
    public static void FMRental_OnValidatingWrite(FormDataSource sender, FormDataSourceEventArgs e)
    {
        var datasource = sender as FormDataSource;
        var args = e as FormDataSourceCancelEventArgs;
        if (args != null && datasource != null)
        {
            FMRental record = datasource.cursor() as FMRental;
            if (record.recId == 0)
            {
                if(record.startmileage == 1)
                {
                    boolean doCancel = !checkFailed("Start Mileage = 1 is not allowed");
                    args.cancel(doCancel);
                }
            }
        }
    }

VALIDATE event handler Form D365 FormDataSourceEventType::ValidatingWrite

How to write a FormDataSourceEventType validate write data event handler code for a Form

/// <summary>
    /// When saving a new rental, prevent setting the start mileage on the FMRental form to a value that is equal to 1
    /// </summary>
    [FormDataSourceEventHandler(formDataSourceStr(FMRental, FMRental), FormDataSourceEventType::ValidatingWrite)]
    public static void FMRental_OnValidatingWrite(FormDataSource sender, FormDataSourceEventArgs e)
    {
        var datasource = sender as FormDataSource;
        var args = e as FormDataSourceCancelEventArgs;
        if (args != null && datasource != null)
        {
            FMRental record = datasource.cursor() as FMRental;
            if (record.recId == 0)
            {
                if(record.startmileage == 1)
                {
                    boolean doCancel = !checkFailed("Start Mileage = 1 is not allowed");
                    args.cancel(doCancel);
                }
            }
        }
    }

Below is the code at the table level for table FMVehicle

Class FMVehicleEventHandlers //write any name of the class
{
    /// <summary>
    ///
    /// </summary>
    /// <param name="sender"></param>
    /// <param name="e"></param>
[DataEventHandler(tableStr(FMVehicle), DataEventType::ValidatedWrite)]
    public static void FMVehicle_onValidatedWrite(Common sender, DataEventArgs e)
    {
        ValidateEventArgs validateArgs = e as ValidateEventArgs;
        FMVehicle vehicle = sender as FMVehicle;
        boolean result = validateArgs.parmValidateResult();

        if (vehicle.NumberOfCylinders > 8)
        {
            result = checkFailed("Invalid number of cylinders.");
            validateArgs.parmValidateResult(result);
        }
    }
}

D365 Parameter Table code

D365 Parameter Table code
Below are the find and exist methods of the parameter table.

public static ParameterTable find(boolean _forupdate = false)
    {
        ParameterTable parameter;

        if (_forupdate)
        {
            parameter.selectForUpdate(_forupdate);
        }

        select firstonly parameter
            index hint KeyIdx
            where parameter.Key == 0;

        if (!parameter && !parameter.isTmp())
        {
            Company::createParameter(parameter);
        }
        return parameter;
    }

    public static boolean exist()
    {
        return (select firstonly RecId from ParameterTable).RecId != 0;
    }

Friday 8 November 2019

TABLE BROWSER IN D365

TABLE BROWSER IN D365

BROWSING A TABLE IN VISUAL STUDIO IS A BIT TEDIOUS AND SLOW TASK.
HOWEVER IN D365 WE HAVE A VERY GOOD OPTION TO CHECK ANY TABLE IN THE BROWSER ITSELF.
YOU WILL JUST NEED TO USE THE BELOW URL .
https://envt.cloudax.dynamics.com/?mi=SysTableBrowser&prt=initial&cmp=eat1&tablename=CUSTTABLE&limitednav=true 

cmp -> company
tablename - > the name of the table
limitednav - > restricts the navigation bar to show only the table and hide other parts.
prt - > it is deprecated


You will see the below screen on using the URL.
TABLE BROWSER IN D365, D365 F&O TABLE BROWSER, BROWSER IN D365, BROWSER D365 FNO, SYSTABLEBROWSER, CHROME EXTENSION FOR TABLE BROWSER D365, D365 ENVIRONMENT,


In case you want a more advanced tool to check the data then you should add the below extension for chrome users.
I think it is not available for IE.

Click on the below link to install the chrome extension.

 Once installed the chrome will have the addon as shown below.
Fist click on the configure tab and input the details of the environment .
Now you can add and see as many tables as you want and it can be filtered as per the company.

thanks,
Vikas Mehta


VALIDATEFIELD CODE example in D365 ax 2012 EVENT HANDLER

VALIDATE FIELD CODE IN D365

Validate Field is called whenever a value is changed at the field level.
For eg. if you write the discount value as 101 you get the error.This error is getting called from the validate field.

public boolean validateField(FieldId _fieldIdToCheck)
{
boolean ret;

ret = super(_fieldIdToCheck);

if(ret)
{
switch(_fieldIdToCheck)
{
case fieldNum(TableName,Quantity):
if(this.Quantity>100)
{
          error("Quantity should be less than 100);
}
break;
//you can add as many conditions as per the number of fields.
//same condition can be shared by two fields ..see below eg.
case fieldNum(TableName,Price):
case fieldNum(TableName,PriceMST):
if(this.PurchQty == 0)
{
          error("Quantity cannot be zero");
}

}

similarly the event handler for the D365 is written as follow.
Post -> it gets called after the standard validatefield.
[PostHandlerFor(tableStr(SalesLine), tableMethodStr(SalesLine, validateField))]
    public static void SalesLine_Post_validateField(XppPrePostArgs args)
    {
        SalesLine salesLine = args.getThis();
        FieldId fieldId = args.getArg("_fieldId");
        boolean ret = args.getReturnValue();

        switch(fieldId)
        {
            case fieldNum(SalesLine, LinePercent):
                if (salesLine.LinePercent > 100)
                {
                    ret = ret && checkFailed("Line per cent is Invalid");
                }
                break;
        }

        args.setReturnValue(ret);
    }

Thanks,
Vikas Mehta.

Thursday 7 November 2019

Counting Journal in D365 :Create and Posting of Counting Journal

HOW TO CREATE COUNTING JOURNAL IN D365 

Counting Journal is used to determine the actual quantity in inventory by adjusting the actual physical quantity in the warehouse with the Onhand inventory in the system.

So the system might have an Onhand qty as 10 pcs but the actual physical qty available in the warehouse might be only 9 pcs which is entered in the couting field.

On Posting the system will adjust the difference in quantity in Dynamics 365 is posted as item issue or receipt.

If Onhand qty > physical qty
            then inventory issue and inventory loss accounts will be updated and the inventory transaction will have status as Sold after posting.
If Onhand qty < physical qty
            then inventory receipt and inventory profit accounts will be updated and the inventory transaction will have status as Purchased after posting.


Steps to create a counting Journal :
Navigate to
1) Inventory management> Journal entries> Item counting> Counting.
CREATING COUNTING JOURNAL IN D365,POSTING COUNTING JOURNAL IN D365,COUNTING JOURNAL IN D365,WHAT IS A COUNTING JOURNAL,HOW TO CREATE A COUNTING JOURNAL,WHAT IS A JOURNAL,Inventory Counting Journal in AX 2012,Creation and Posting of Counting journal in MS Dynamics AX 2012,onhand,on-hand counting journal,difference adjust,,Inventory management> Journal entries> Item counting> Counting.
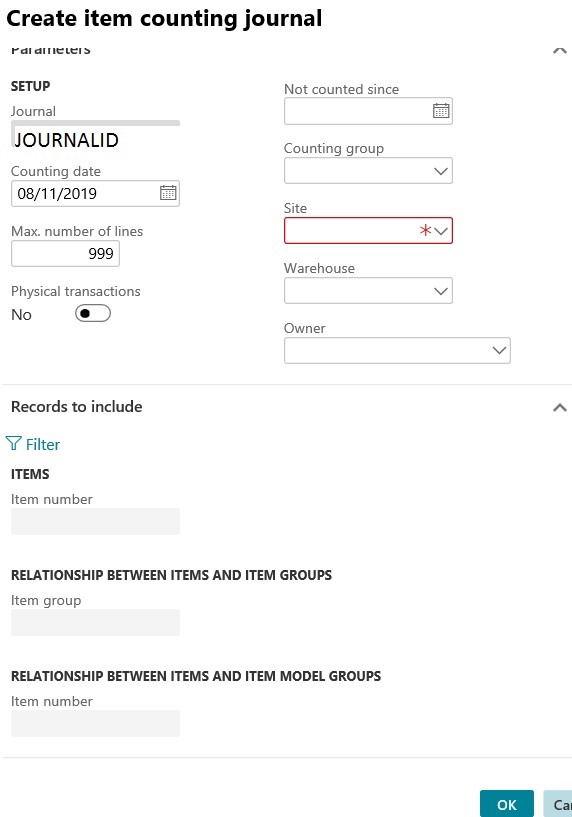
2) Click on New button to create the header. Input the site and warehouse and click ok.

CREATING COUNTING JOURNAL IN D365,POSTING COUNTING JOURNAL IN D365,COUNTING JOURNAL IN D365,WHAT IS A COUNTING JOURNAL,HOW TO CREATE A COUNTING JOURNAL,WHAT IS A JOURNAL,Inventory Counting Journal in AX 2012,Creation and Posting of Counting journal in MS Dynamics AX 2012,onhand,on-hand counting journal,difference adjust,,Inventory management> Journal entries> Item counting> Counting.


of the counting journal.
3) Once the header is created you can create  the counting journal lines by specifying the
counting Date, item number, site, warehouse, etc.
The counted quantity has to be entered in the column Counted.
On-hand shows the corresponding inventory quantity in Dynamics 365 as of the counting date. The difference between the counted and the on-hand quantity is displayed in the column Quantity.

CREATING COUNTING JOURNAL IN D365,POSTING COUNTING JOURNAL IN D365,COUNTING JOURNAL IN D365,WHAT IS A COUNTING JOURNAL,HOW TO CREATE A COUNTING JOURNAL,WHAT IS A JOURNAL,Inventory Counting Journal in AX 2012,Creation and Posting of Counting journal in MS Dynamics AX 2012,onhand,on-hand counting journal,difference adjust,,Inventory management> Journal entries> Item counting> Counting.
Once created you can validate and post it.
However there are other ways also to create the counting lines by clicking the Create Lines button as shown below. Each of the options has a filter which can be used to further filter down the number of items required for counting journal.

CREATING COUNTING JOURNAL IN D365,POSTING COUNTING JOURNAL IN D365,COUNTING JOURNAL IN D365,WHAT IS A COUNTING JOURNAL,HOW TO CREATE A COUNTING JOURNAL,WHAT IS A JOURNAL,Inventory Counting Journal in AX 2012,Creation and Posting of Counting journal in MS Dynamics AX 2012,onhand,on-hand counting journal,difference adjust,,Inventory management> Journal entries> Item counting> Counting.

Onhand - > will create lines of items having onhand greater then zero.
create counting lines ini dynamics ax,CREATING COUNTING JOURNAL IN D365,POSTING COUNTING JOURNAL IN D365,COUNTING JOURNAL IN D365,WHAT IS A COUNTING JOURNAL,HOW TO CREATE A COUNTING JOURNAL,WHAT IS A JOURNAL,Inventory Counting Journal in AX 2012,Creation and Posting of Counting journal in MS Dynamics AX 2012,onhand,on-hand counting journal,difference adjust,,Inventory management> Journal entries> Item counting> Counting.
Item - > Will create all the items having onstock value zero or non -zero.

Expired batch - > creates journal lines only for those items with an expired batch date. This enables warehouse staff to count only those items with expired batches so that these items can be removed from inventory.

Once all the lines are created they can be validated and then Posted to to adjust the On-hand quantity as per the actual physical quantity in the system.

xxxxxxxxxxxxxxxxxxxxxxxxxxxxxxxxxxxxxxxxxxxxxxxxxxxxxxxxxxxxxxxxxxxxxx

Count inventory in a warehouse

This topic describes the process of creating and posting an inventory counting journal in order to count a specific item at a location in the warehouse. The procedure applies to "basic warehousing" functionality, available in the Inventory management module, not to the warehousing functionality that's available in the Warehouse management module. You can walk through this procedure in demo data company USMF, or using your own data. If you're using your own data, make sure that you have products and locations set up, and that you've created an inventory journal name for counting journals. Inventory counting is normally carried out by a warehouse employee.

Create an inventory counting journal

1.     Go to Navigation pane > Modules > Inventory management > Journal entries > Item counting > Counting.

2.     Select New.

3.     In the Name field, select the inventory counting journal name you want to use from the drop-down list. Some other fields will be populated based on the setup of the inventory counting journal name that you select.

4.     In the Worker field, select the drop-down button to open the lookup.

5.     In the list, Select the worker you want to use.

6.     Select OK.

Create journal lines

1.     Select New.

2.     In the Item number field, select the desired record from the drop-down list. If you are using demo data company USMF, select A0001.

3.     In the Site field, select the desired record from the drop-down list. If you are using demo data company USMF, select site 2.

4.     In the Warehouse field, select the desired record from the drop-down list. If you are using demo data company USMF, select warehouse 24.

5.     In the Location field, select the desired record from the drop-down list. If you are using demo data company USMF, select location BULK-001.

6.     In the Counted field, enter a number. If you enter a counted number that's different to the number shown in the On-hand field, the Quantity field is updated to show the discrepancy.

7.     Select Save.

Post the inventory counting journal

1.     Select Post. When you post an inventory counting journal, if the counted amount differs from amount that's reported in the On-hand field an inventory receipt or issue is posted, the inventory level and value are changed, and ledger transactions are generated.

2.     Select OK.

View inventory transactions

1.     Select Inventory.

2.     Select Transactions. Here you can see any related transactions that will be created when you post your inventory counting journal.


thanks,
Vikas Mehta.


Tuesday 5 November 2019

how to add range the query of the contract class in D365 code.

how to add range the query of the contract class in D365 code.

 private void initQuery(Contractclass _contract)
    {
        query   = _contract.getQuery();
        wmsQBDS = query.dataSourceTable(tableNum(inventtable));

        QueryBuildRange      errorRange = wmsQBDS.addRange(fieldNum(inventtable, Isopen));

        errorRange.value(queryValue(NoYes::No));
        errorRange.status(RangeStatus::Locked);

        QueryBuildDataSource QBDS =

       QBDS.addDataSource(tableNum(NewTable));
        wmsHeaderQBDS.relations(true);
        wmsHeaderQBDS.joinMode(JoinMode::ExistsJoin);
        SysQuery::findOrCreateRange(wmsHeaderQBDS, fieldNum(NewTable, Newfield)).value('newrange');
     
    }
Please note that NewTable needs to have a relation with the InventTable or else you will also need to add a new relation.

Thanks,
Vikas Mehta.

AZURE INTERVIEW QUESTIONS AND ANSWERS

AZURE INTERVIEW QUESTIONS AND ANSWERES 2021 2. What is cloud computing? Explanation:  It is the use of servers on the internet to “store...